Installation Overview#
The Phonein Smart Intercom is an intercom replacement device, installed inside your apartment/office. In most cases it will fully replace your intercom door-phone.
With Phonein, you will have all the functionality of your old intercom, including being able to speak to the guest and buzz them in directly from the device, but also you have these and many additional smart features available from your smart phone.
What you'll find in the Box?#
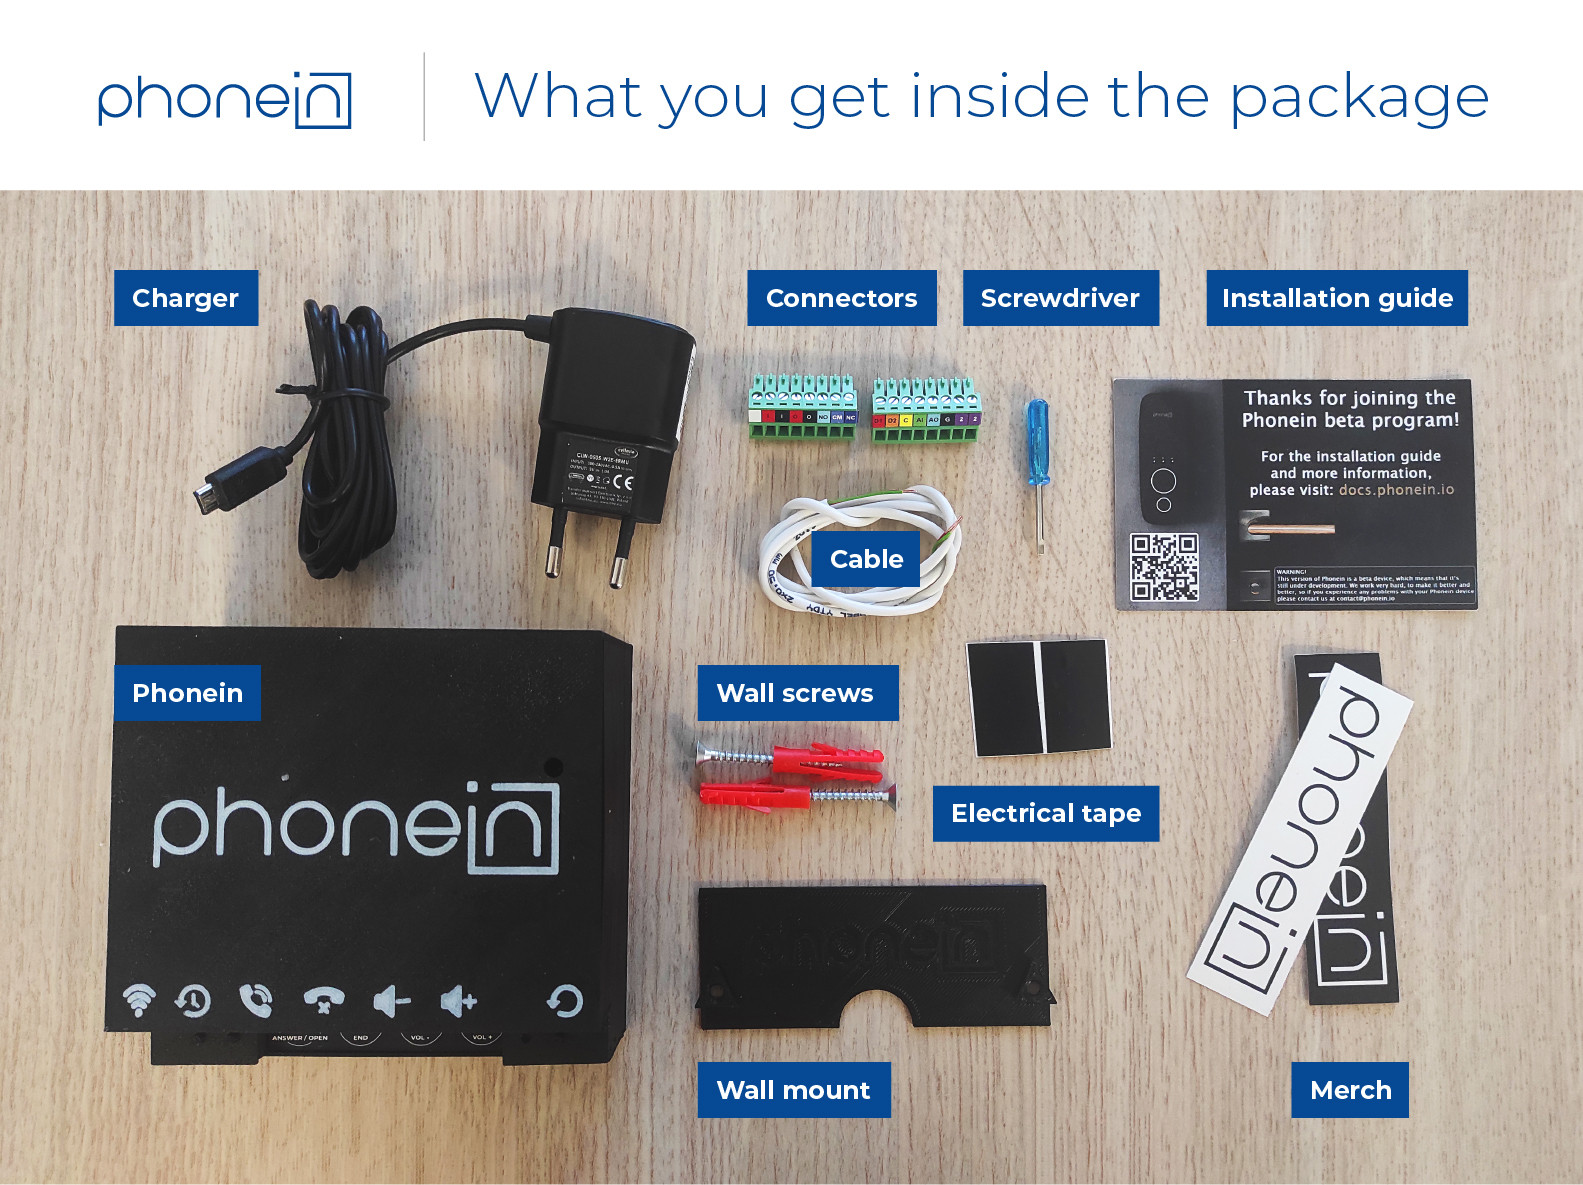
Your Phonein hardware comes with the following:
- The Phonein Device
- On the back you’ll find the QR code, necessary for activating your device.
- Wall mount
- With this you can install your PhoneIn on the wall.
- You can use the sticky tape on the back of the wall mount piece, but we recommend using screws for a secure installation. You can find these in the box as well.
- Wall charger
- Phonein has an internal battery, so you don’t need to leave it plugged in to the wall. However, the device is faster if it’s powered through the charger, so if you can leave it plugged in, that’s even better and we recommend it!
- Connectors
- You will find two green connectors. The doorbell connector and the powerline connector.
- The doorbell connector ends with two purple slots each with the label "2". It is for connecting to the intercom system.
- The powerline connector is only needed if you want to use an external power supply, or you have a strikelock.
- There is also some extra wire, a little screwdriver and some electrical tape, which you can use during the installation.
- You will find two green connectors. The doorbell connector and the powerline connector.
By the way...#
This version of Phonein is a beta device, which means that it’s still under development. We work very hard to make it better and better, so if you experience any problems with your Phonein device, or questions or recommendations about the installation process, please check the Troubleshooting Guide or contact us at contact@phonein.io.
Please follow the Installation guide to set up your Phonein device.