Installing the Phonein Intercom#
Your Phonein intercom is intended to entirely replace your old intercom phone. The Phonein smart intercom includes all the functions of your current door phone right on the device, as well as having all the additional smart features detailed in the User Guide.
note
Parallel Installation - If you'd like to set up the Phonein smart intercom in parallel of your existing phone for testing and familiarization purposes, we will detail that option below as well.
Installation steps#
1. Open your old intercom phone#
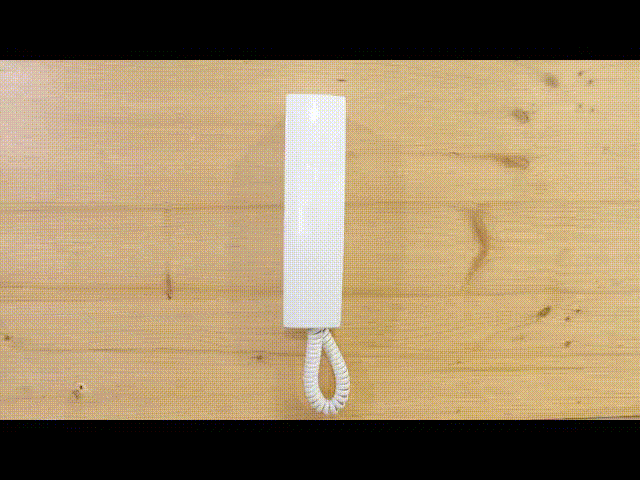
Usually these intercoms are held together by screws, unscrew these to open the old intercom phone.
If you don’t see any screws, try inserting a screwdriver into the seam on the side of the intercom, and gently pry it open.
2. Take pictures of the inside of your intercom phone now#
- Save these pictures, because if you need to move things back for any reason, they will help you remember what goes where.
- Make sure you have clear pictures of the wires, and where they connect to the old intercom!
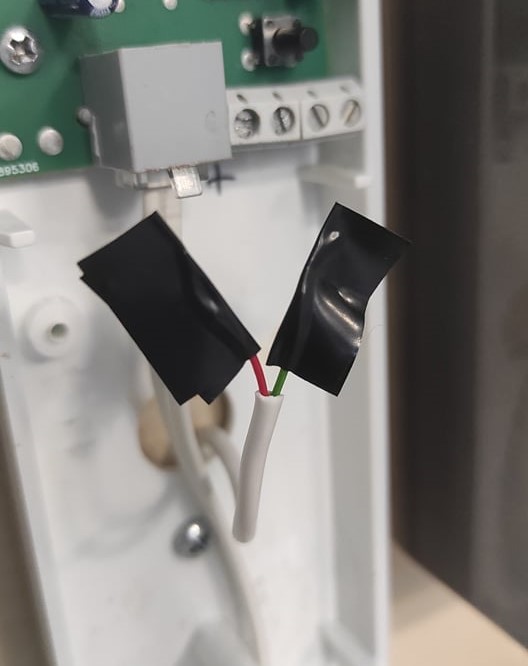
3. Locate the wires coming from the wall#
- In most of the cases, you’ll see either 2 or 5 wires coming from the wall, and connecting to the handset. Much of the install flow will be the same for both cases.
- For now, identify which wires are coming from the wall, and move on to the next step.
BE CAREFUL!!!
You are working with an electric device. Make sure that you don’t touch the non insulated part of the wires, and you don’t let the wires touch each other! In the package you'll find pieces of electrical tape. Use these to insulate any loose wire ends while you're installing other parts. You can easily remove them later.
4. Installing Phonein on the wall#
note
To replace your intercom phone with Phonein, please proceed with the standard installation.
If you prefer to keep your intercom phone and connect your Phonein device in parallel, so both devices work together, select Parallel Installation.
- Standard Installation
- Parallel Installation
Removing the old intercom phone
a. Remove the wires from the terminal (insulate them with electrical tape, as shown above).
b. Remove the old intercom from the wall.
If you have a 4+n wire system, please read the 4+n wiring guide, which will explain which wire goes where in the connector. These wires are NOT interchangeable.
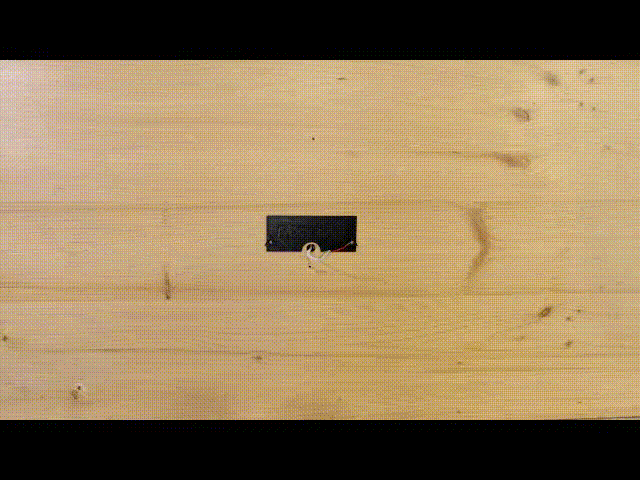
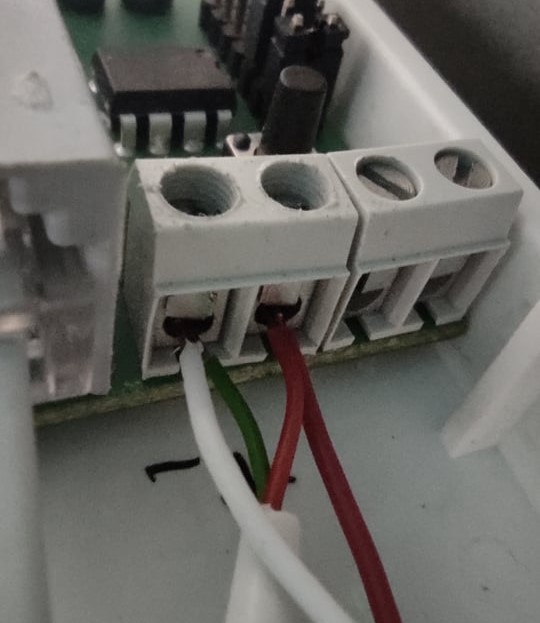
Attaching the wires from the wall to the provided green connector
a. Locate the supplied green connector with two purple terminals with the number '2' on the far right side.
b. Using that green connector, connect the two wires coming from the wall to the purple terminal places with the number 2 written on them (it doesn't matter, which wire goes to which of the 2 places).
Attaching supplied wires to the connector
If you have a 4+n wire system, please read the 4+n wiring guide, which will explain which wire goes where in the connector. These wires are NOT interchangeable.
a. Locate the supplied green connector with two purple terminals with the number '2' on the far right side. Take the supplied extra wiring cable from the Phonein packaging.
b. Connect the two wires from the cable to the purple terminal places with the number '2' written on them.
Connect to the intercom
a. Connect the other end of the cable right next to the existing ones, inside the terminal on your old intercom. (The new wires should go to the same exact place as the original wires from the wall, without removing the originals)
b. Lead the new wires out from the intercom case. (There is usually a small gap where the handset wire exits the housing)
c. Close the old intercom.
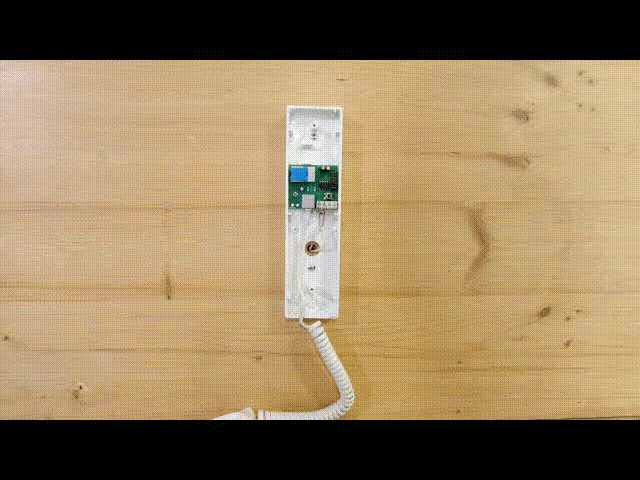
5. Install the Phonein wall mount.#
- You can use the sticky tape on the wall mount, but for a secure installation, we recommend screwing it to the wall, with the provided screws.
6. Plug in the connector into the Phonein.#
- Make sure you match the colours found on the connector and the Phonein case.
7. Place your Phonein on the wall mount piece.#
- The Phonein has a little compartment on the back, where you can hide the excess wires.
Finished!
Now please follow the steps on the next page to Set up the Phonein App!
You can also connect the Phonein Intercom to an electric strike lock for smart door access to your residence and/or office. For more information, see Connecting Phonein Intercom to a Strike Lock.